Be More Productive with the Rule of 3

Matt Chan • March 22, 2016

This article was originally published on LinkedIn by Chris Bailey on Oct 28th 2015. Chris is a self-proclaimed Jedi Master at A Life of Productivity  where he blogs about being productive.

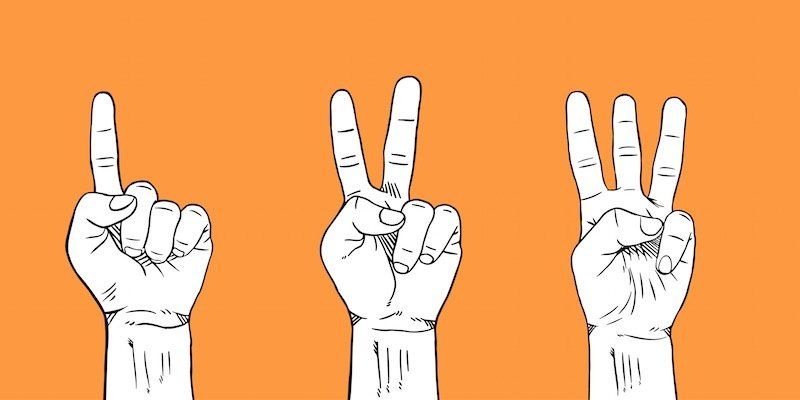
For Some Strange Reason, Our Brain is Wired to Think in Threes.

As kids, we grow up immersed in stories that involve threes: Goldilocks and the Three Bears, the Three Blind Mice, and the Three Little Pigs. In high school, when we’re forced to dissect books like The Three Musketeers for English class, we break down the plot into three parts—the beginning, middle, and end. When we become adults, we observe that good things happen in threes, and that the “third time’s the charm.” The Olympics awards three medals for each event—gold, silver and bronze… Well, you get the idea.

There is something oddly attractive about the number three which can help you a lot as far as productivity is concerned.

Good #ProductivityHacks are hard to come by. There’s no shortage of advice out there, but after you read it, you have to make all that time back, presumably by using the very tactics you’re reading about. If the productivity hacks don’t help you earn that time back—and then some—you’re really just looking at productivity porn.

Over the last decade, I’ve experimented with countless productivity hacks. Some of them have worked, many of them haven’t. But the one productivity hack that has produced the greatest returns for me is the Rule of 3.

Here’s the Rule of 3:

  • At the start of every morning, fast-forward to the end of the day and ask: When the day is done, what three things will I want to have accomplished?
  • Do the same at the start of every week.

That’s it.

The rule is simple, but deceptively so. I’ve found that the Rule of 3 helps me work more efficiently and earn back more time than any other productivity hack:

  • It fits with the way we think. For some reason that I haven’t been able to figure out, from childhood our brain is wired to think in threes.
  • It’s hard to keep in mind what’s important. While you won’t remember a whole laundry list of things to do when you’re in the trenches, you’ll remember your three intentions.
  • You decide what you don’t By picking the three main things you want to accomplish that day, you have taken the time to separate what’s important from what isn’t.
  • It only takes a minute. For every minute you spend using the Rule of 3, you gain back at least 10 minutes of productivity.
  • It helps you work more deliberately. Productivity is the process of working more deliberately, with intention. The Rule of 3 helps you to step back, determine what’s important, and then reflect throughout the day on whether you’re spending your time on the right things. The intention behind your actions is like the shaft behind an arrowhead. I haven’t found a better rule for setting intentions every day.
  • The rule lets you consider your limits. Each day you only have so much time, attention, and energy. Productivity is a process of understanding your constraints. The Rule of 3 helps you think about how much want to accomplish, and then, over time adjust to how much you actually can accomplish once you better understand your limits. At first, I overestimated how much I could get done when defining my three things; later I underestimated what I was capable of. Finally I settled into an equilibrium where I understood how much I could do every day. That awareness has become, as Steve Jobs might say, insanely valuable.

As you might expect with something so simple, the rule is ageless. It has been talked about by everyone from Leo Babauta of Zen Habits to Gina Trapani of Lifehacker. I first discovered the rule from J.D. Meier, the author of Getting Results the Agile Way . J.D. is Microsoft’s Director of Business Programs, where he and his team use the rule every day. When I asked J.D. why he thought the rule is so powerful, he said, “I originally focused on the Rule of 3 because when my manager asked me what the team achieved for the week, he didn’t want a laundry list. He was willing to listen to three compelling outcomes.” J.D. found that “three things was very easy to keep top of mind, without having to write it down or look it up.”

I’ve found the exact same thing.

When your aim is to work more deliberately and accomplish more over the day, the Rule of 3 is in a league of its own.

Chris Bailey blogs about productivity over at A Life of Productivity . He’s the author of the forthcoming book, The Productivity Project: Accomplishing More by Managing Your Time, Attention, and Energy , which will be published in January 2015 by Crown Business.

CONTACT

Share

RECENT POSTS

By Matthew Chan February 18, 2026
For most Canadians, the down payment is the biggest hurdle to homeownership. A down payment is the initial amount you contribute toward your property purchase, while the lender covers the rest through a mortgage. By law, Canadian lenders can only finance up to 95% of a property’s value, which means you’ll need at least 5% down to qualify. If you’re putting down less than 20%, your mortgage must be insured through one of Canada’s three default insurance providers— CMHC, Sagen (formerly Genworth), or Canada Guaranty . This insurance comes at a cost, but it can be rolled into your mortgage amount. The less you put down, the higher the premium. Since saving a down payment can feel overwhelming, it helps to know the different sources you can draw from. Here are the most common options available to Canadian homebuyers: 1. Savings & Personal Resources The most straightforward source is your own savings. Lenders will ask to see a 90-day history of the funds in your account. Any large deposits outside of regular payroll must be explained with documentation—such as the sale of a vehicle or a transfer from an investment account. This requirement isn’t just red tape; it’s part of Canada’s anti-money laundering rules. 2. Proceeds from the Sale of a Property If you’ve recently sold another home, you can use the proceeds as a down payment on your new purchase. Proof of the sale—such as the final statement of adjustments from your lawyer—will be required. 3. RRSP Home Buyers’ Plan (HBP) First-time buyers can withdraw up to $35,000 each (or $70,000 as a couple) from their RRSPs to put toward a down payment under the federal Home Buyers’ Plan . The funds are withdrawn tax-free, but they must be repaid over a 15-year period. This is a popular option for buyers who have been steadily contributing to their retirement savings. 4. Gifted Down Payment With today’s housing prices, many buyers turn to family for help. A parent or immediate family member can provide a gift that makes up part—or even all—of the required down payment. The lender will require a signed gift letter confirming that the money is a true gift (with no repayment expected) and proof that the funds have been deposited into your account. 5. Borrowed Down Payment In some cases, you may be able to borrow your down payment. This option is usually available only if you have strong credit and sufficient income. The payments on the borrowed funds are factored into your debt service ratios, so affordability is key. Lenders typically use 3% of the outstanding balance when calculating the additional payment. The Bottom Line A down payment doesn’t have to come from just one source—it can be a combination of savings, gifted funds, RRSPs, or other resources. What matters most is being able to show where the money came from and that it meets lender requirements. If you’d like to explore your options or learn how much you might qualify for, it’s never too early to start the conversation. Connect with us today—we’d be happy to help you create a plan and take the first steps toward homeownership.
By Matthew Chan February 11, 2026
Buying a home is one of the biggest financial commitments you’ll ever make. That’s why lenders want to be sure you can handle your mortgage payments—not just today, but also if interest rates rise in the future. This is where the mortgage stress test comes in. Many Canadians hear the term but aren’t entirely sure what it means or how it affects them. Let’s break it down in plain language. What Is the Mortgage Stress Test? The stress test is a rule introduced by the federal government that requires all mortgage applicants to qualify at a higher rate than the one they’ll actually pay. Currently, you must qualify at the greater of your contract rate + 2% or the benchmark qualifying rate (set by the Office of the Superintendent of Financial Institutions). For example: If your lender offers you a 5-year fixed mortgage at 5.25%, you must show you could still afford the payments at 7.25% . Even if rates don’t rise that high, the stress test ensures you won’t be overextended if they do. Why Does It Matter? The stress test protects both borrowers and lenders by: Preventing over-borrowing : It ensures you don’t take on more debt than you can realistically handle. Preparing for rate hikes : With interest rates fluctuating, it’s a safeguard against sudden increases. Strengthening financial stability : It lowers the risk of defaults, protecting the housing market as a whole. While it can sometimes feel like a barrier—reducing the amount you qualify for—it’s ultimately designed to keep you from becoming “house poor.” How Does It Impact Buyers? The stress test can significantly affect your homebuying budget. For example, without it, you might qualify for a $600,000 mortgage, but with the stress test applied, you may only qualify for $500,000. That doesn’t mean your dream of homeownership is out of reach—it just means you may need to adjust expectations or explore other strategies, such as: Increasing your down payment Paying down existing debts Considering alternative lenders who may have different qualification standards Why Work With a Mortgage Professional? Every lender applies the stress test, but not every lender views your application the same way. An independent mortgage professional can: Shop multiple lenders to find the best fit Run affordability scenarios at different rates Help you understand how much house you can truly afford—without stretching your finances too thin The Bottom Line The mortgage stress test isn’t meant to stop you from buying a home—it’s there to protect you from financial strain down the road. By understanding how it works and planning ahead, you can make smarter choices and buy with confidence. If you’re thinking about purchasing a home, refinancing, or simply want to know how the stress test affects your options, connect with us today. We’ll help you stress-test your budget and find the mortgage solution that works best for you.
By Matthew Chan February 4, 2026
You’ve found the right home, your offer’s been accepted, and your financing is approved—congratulations! But before you can pick up the keys and celebrate, there’s one more important stage: the closing process. Closing is the final step in your homebuying journey, where all the paperwork, legal details, and financial transactions come together. It can feel overwhelming if you don’t know what to expect, but with the right preparation, closing can be smooth and stress-free. Here’s a step-by-step guide to help you understand the process. Step 1: Hire a Lawyer or Notary A real estate lawyer (or notary, depending on your province) handles the legal side of closing. They will: Review the purchase agreement and mortgage documents Conduct a title search to confirm the seller has the legal right to sell the property Ensure the mortgage lender is properly registered on the title Handle the transfer of funds between you, the lender, and the seller Your lawyer or notary will be your main point of contact during closing, so choose one you trust and who communicates clearly. Step 2: Finalize Your Mortgage Your lender will send the mortgage instructions directly to your lawyer or notary. At this stage: You’ll provide proof of property insurance (lenders require this before releasing funds) You’ll confirm your down payment and closing costs are available in your lawyer’s trust account The lawyer will prepare all documents for your review and signature Step 3: Pay Closing Costs Closing costs typically range from 1.5% to 4% of the purchase price. These can include: Legal fees Title insurance Land transfer tax (where applicable) Adjustments for property taxes or utilities prepaid by the seller Home inspection or appraisal fees (if not already paid) Your lawyer will provide a final statement of adjustments so you know exactly how much is due on closing day. Step 4: Sign the Paperwork A few days before closing, you’ll meet with your lawyer or notary to sign all the necessary documents, including: Mortgage agreement Title transfer Insurance confirmations Statement of adjustments Bring valid government-issued ID to this appointment. Step 5: Transfer of Funds On the day of closing: Your lender sends the mortgage funds to your lawyer Your lawyer combines these funds with your down payment and pays the seller Legal ownership of the property is transferred into your name The lender is registered on title as a secured creditor Step 6: Get the Keys! Once the paperwork is filed and the funds have cleared, your lawyer will confirm that the transaction is complete. You’ll then get the keys to your new home—officially making it yours. The Bottom Line The closing process is a series of important steps, but with the right team in place, it doesn’t have to be stressful. By working closely with your mortgage professional and lawyer, you’ll have guidance every step of the way—from signing the documents to turning the key in the front door. If you’d like help preparing for the closing process—or want a clear breakdown of your own closing costs— connect with us today.